Content for students

Install Check Point® Endpoint Security VPN
-
Download the Endpoint Security VPN Client (SSL);
Version E86.80 | Windows 10 and 11 | Checksum: SHA1 b340c804b375cb628fe384e793311c6ad886fa66
-
Run it;
-
Select the "Next" option when asked if you want to run the installation programme;
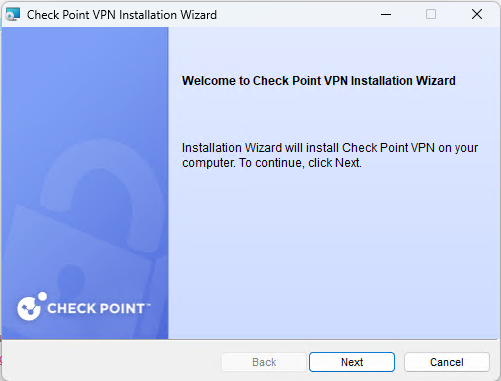
Run the Windows SSL VPN Client
-
Select the "Endpoint Security VPN" option and then select the "Next" option;
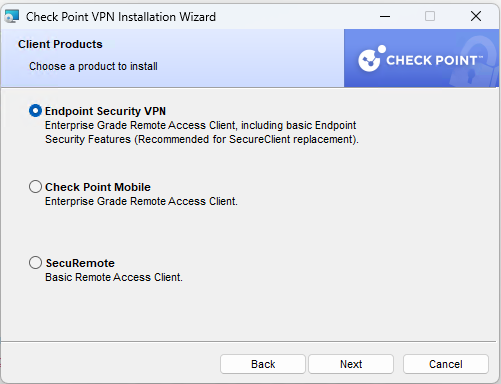
"Endpoint Security VPN" option
-
Select the option "I accept the terms of the licence agreement" and then "Install";
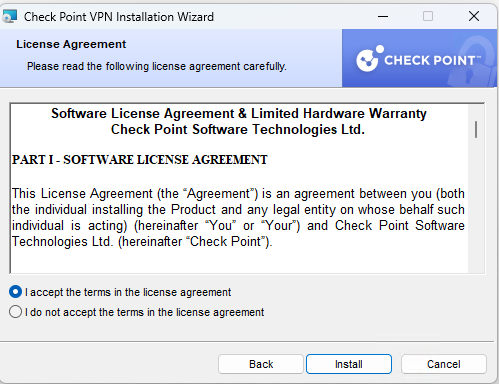
Option "I accept the terms in the licence agreement"
-
Select the "Finish" option to finalise the installation.

Installation completed
Configure
-
On the desktop, click on the Check Point® Endpoint icon in the icon area of the Windows system tray with the direct mouse button and select the "Connect" option;
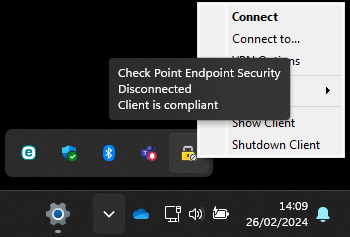
Windows system tray icon area
-
Select "Yes" to set up a new VPN connection;

Set up a new VPN connection
-
Select "Next" to proceed with setting up a new VPN connection;

Setting up a new VPN connection
-
Choose the following options:
Server address or Name: vpn.icbas-ff.up.pt
Display name: VPN ICBAS FFUP SSL
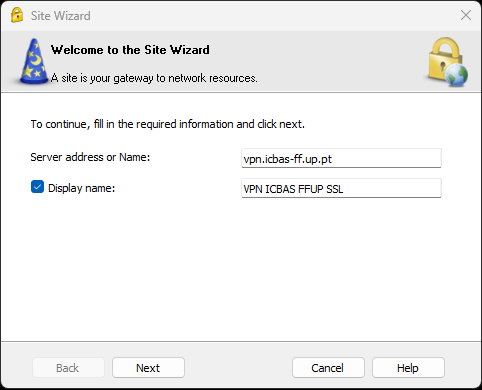
Setting up a new VPN connection
-
Select "Next";
-
Select "OK" to accept the certificate;
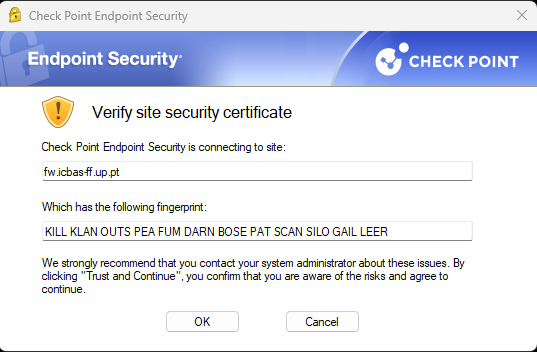
Accept the certificate
-
In the "Authentication Method" window, select the "Username and Password" option and then select "Next";
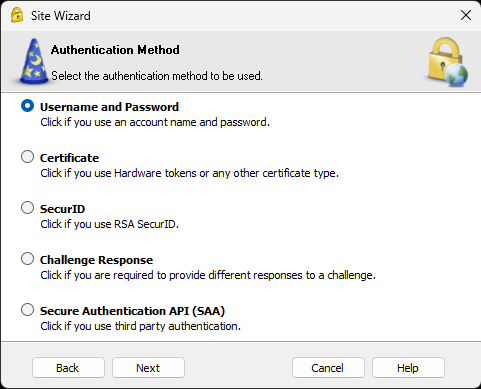
"Authentication Method" window
-
Select "Finish" to complete the creation of the VPN connection.

Complete VPN connection
Connect to the VPN
-
When asked if you want to connect, select "Yes".

Connect VPN?
-
When prompted on the authentication screen, enter your username in the form up[123456789]@[institution].up.pt[ 1 ] and your Information System password;
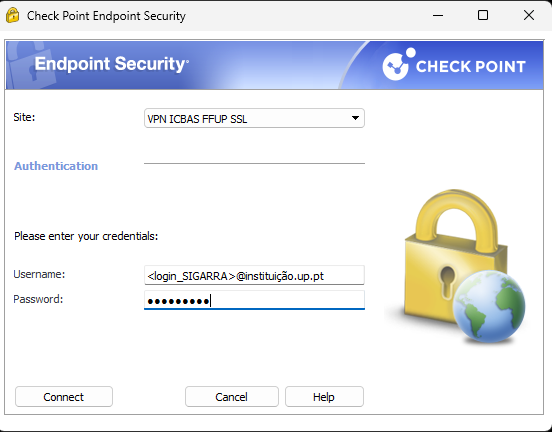
Authentication screen
-
Select "Connect";
-
If the connection is established, you will get the status "Connected" and the icon will appear in the icon area of the Windows system tray;
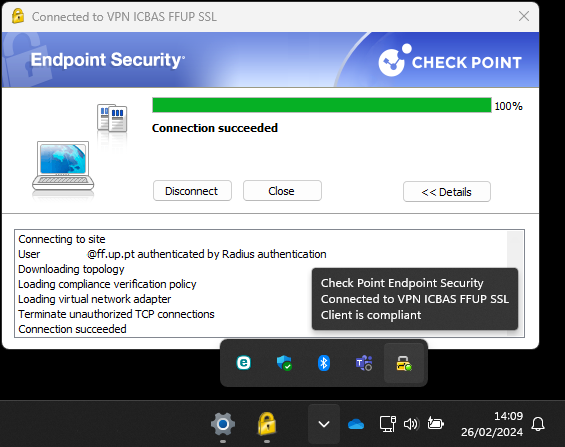
On status
-
To reconnect and use the installed VPN connection, you can select the Check Point® Endpoint Security icon in the icon area of the Windows system tray and select "Connect" on the desired VPN connection.
Notes
- The numerical part corresponds to your student/mechanographic number and the institution corresponds to your home institution (cdup, arq, fade, fba, fc, fna, direito, fe, fep, ff, fmd, fpce, icbas, letras, med, reit, sas or sp).
