Content for students
-

- About UPdigital
-
IT Services
- IT Services Directory
- Accessibility and Disability
- Web Apps
- Teaching Support
- Archives, Libraries and Repositories
- U.Porto Card
-
Accounts and Passwords
- Web Hosting
- Change/Recover Password
- Institutional Authentication
- Configure Forwarding in Microsoft Outlook 365
- Email Account (Lecturers and Staff)
- Email Account (Students)
- Google for Education
- HPC and Grid Computing
- Virtual Machines to Support Teaching and Research
- Microsoft Office 365 (Lecturers and Staff)
- Microsoft Office 365 (Students)
- Email Service
-
Printing
- Logging In to Printing Devices
- Load Quota
- Copying
- Scanning
- Web Printing
- Printing (Release Jobs to Print Devices)
- Printing From Institutional Equipment (Using PaperCut MF Client)
- Printing From Personal Devices (Installing Mobility Print)
- Printing From Personal Devices with Linux Operating System (Installing Mobility Print)
- Pricing
- Printing Service
- Website of the Printing Service
-
Networks and Connectivity
- Mobile Communications
- Wired Network
- Telephony (VoIP)
- VPN - Android (Manual Configuration)
- VPN - Android (FEUP Manual Configuration: SSL Check Point® Capsule)
- VPN - iOS (Automatic Configuration)
- VPN - iOS (Manual Configuration)
- VPN - iOS (FEUP Manual Configuration: SSL Check Point Capsule)
- VPN - Mac (Automatic Configuration)
- VPN - Mac (Manual Configuration)
- VPN - Mac (FEUP Manual Configuration: SSL Check Point Endpoint)
- VPN - Windows (Automatic Configuration)
- VPN - Windows 10 (Manual Configuration)
- VPN - Windows 10 (FEUP Manual Configuration: SSL Check Point Capsule)
- VPN - Windows 10 and 11 (Manual Configuration ICBAS and FFUP: SSL Check Point Endpoint)
- VPN - Windows 7 (Manual Configuration)
- VPN - Ubuntu (Manual Configuration)
- VPN - Ubuntu (FEUP Manual Configuration: PPTP)
- Wi-Fi
-
Information System
- Accessing your personal page
- Accessing Course Unit Fact Sheets
- Updating Personal Data
- Authentication (Login)
- Configuring your personal data
- Confirm Personal Data
- Viewing your current account
- Viewing your timetable
- Viewing your academic path
- Consulting Periods of Limitation
- Creating a multipurpose declaration
- Inserir/Alterar Fotografia
- Integration of Course Units with Moodle and Microsoft Teams
- Requesting a certificate
- Requesting a digital certificate
- Requesting a [email protected] Pass
- Software
-
Cyber Security
- Report Incident
-
Computer Security and Privacy
- Antivirus
- IT Security Audit
- Client Digital Certificates - Sign Email Messages
- Client Digital Certificates - Digital Signing of Documents (Non-Qualified Digital Signature)
- Client Digital Certificates - Install
- Client Digital Certificates - Obtaining a Certificate
- Client Digital Certificates - Revocation
- Digital Certificates for Servers
- Policies and Good Practices
- Data Protection
- Tutorials
- Help and Support
- Contacts

Installing the automatic configurator
-
Choose the Windows VPN L2TP/IPsec automatic configurator according to your institution[ 1 ] and the Windows operating system (32/64 bits)[ 2 ];
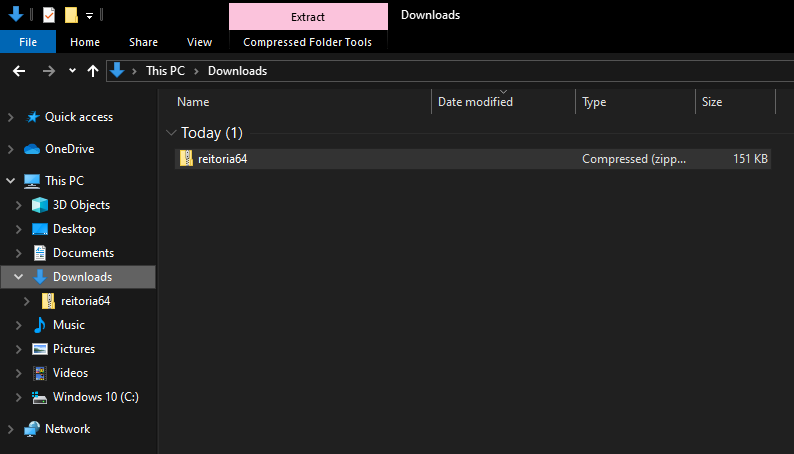
Automatic configurator download
-
Extract the downloaded file;
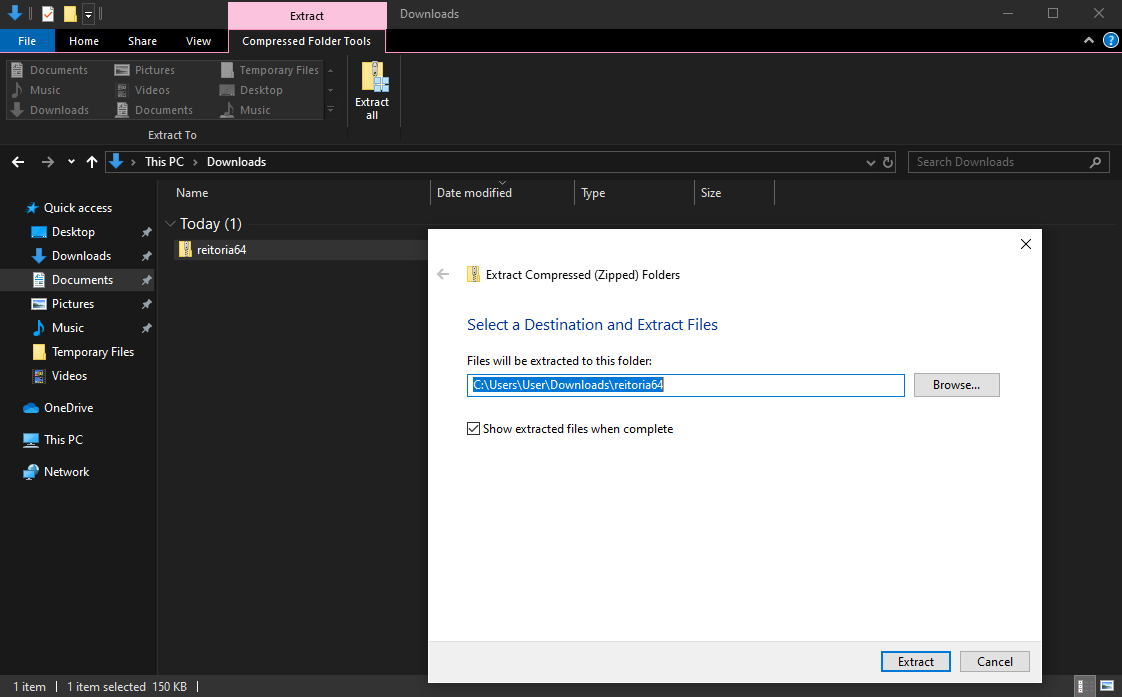
Extracting the downloaded file
-
Execute the automatic configurator and select the "Yes" option when asked if you want to install a VPN;

Installing the VPN
-
Select the "All users" option and check the "Add a shortcut on the desktop" option (if you wish);
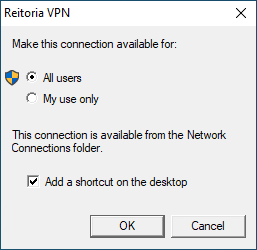
Configuration Options
-
Click on "OK"
-
The installation finishes when the "Network Connections" window and the "VPN Authentication" window appear;
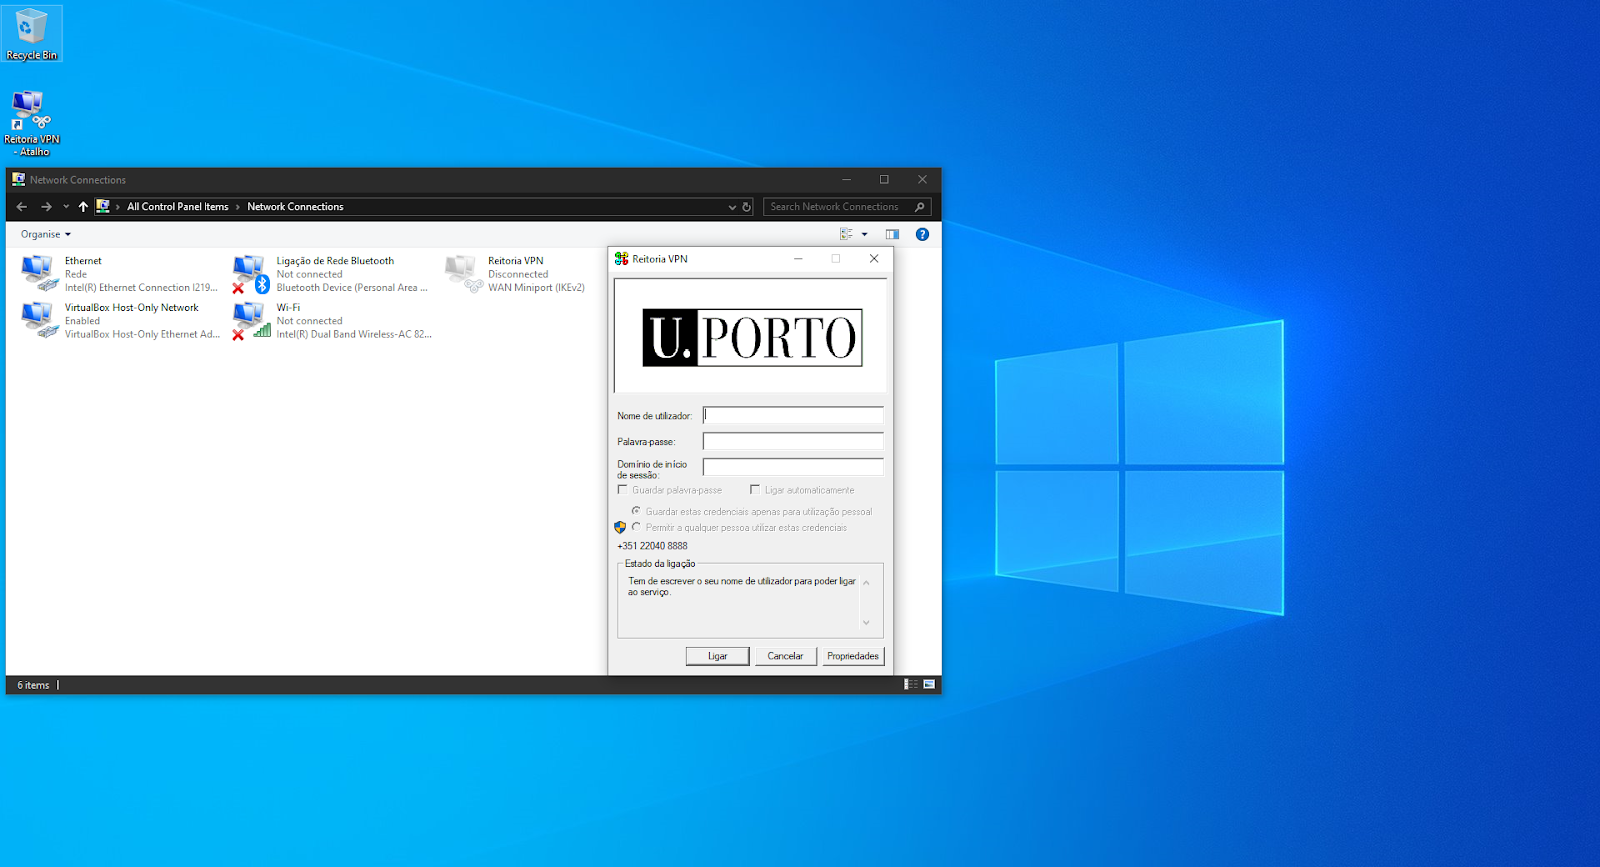
Network Connections
-
If you chose the option on the screenshot, a shortcut will also be added to your desktop to indicate the VPN connection installed.
Connecting to the VPN
-
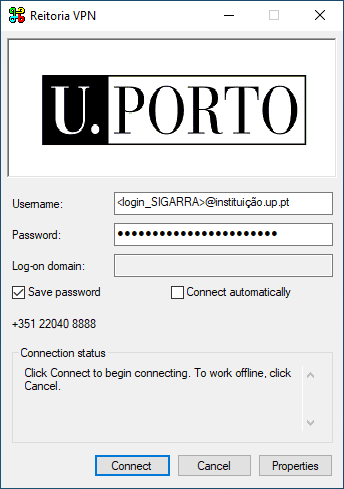
In the "VPN Authentication" window, insert a username in the format up[123456789]@[institution].up.pt [ 3 ] and the password of the Information System.
-
Click on "Connect";
-
To save the access data of the VPN connection, check the "Save password" option;
Saving the access data for the VPN connection
-
If the connection is established, the status is described as "Connected" after selecting the "Network" option.
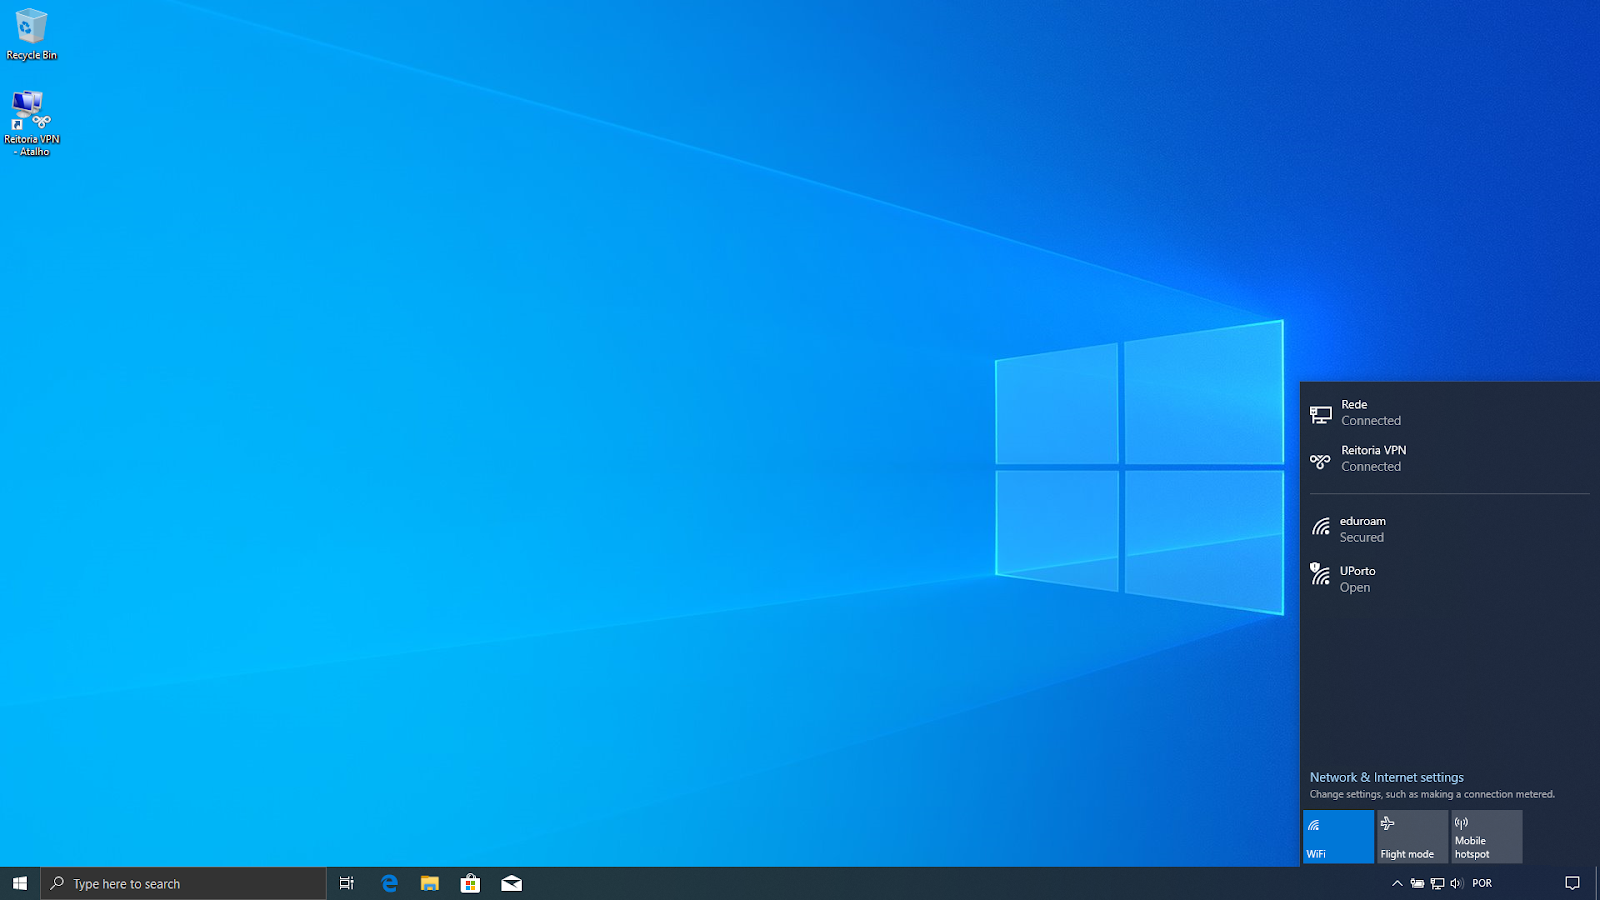
Connected Status
Connection problems
If the connection is not established, select the "Properties" option in the "VPN Authentication" window and check if the configuration options selected are the following:
- Select "I am already connected to the Internet");
- "Settings saved as" Home <default>;
Next, click on "OK";
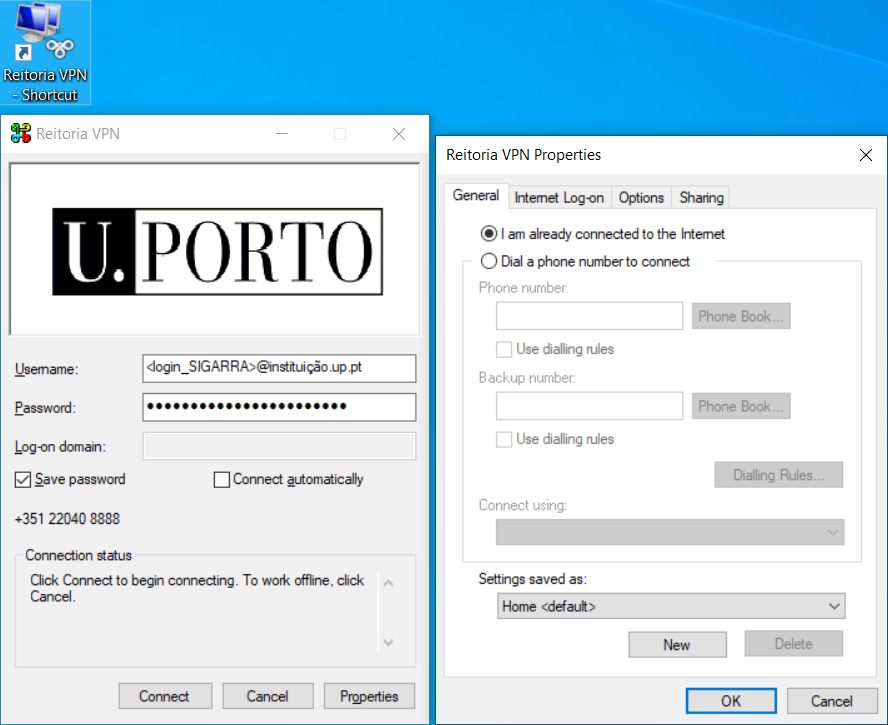
VPN Connection Properties
Notes
- Windows VPN L2TP / IPsec Automatic Configurator by institution:
| Institution | 32 bits Configurator | 64 bits Configurator |
|---|---|---|
FAUP |
||
FBAUP |
||
FADEUP |
||
FCNAUP |
||
FDUP |
||
FEP |
||
FEUP |
||
FFUP |
||
ICBAS |
||
FMDUP |
||
FMUP |
||
FPCEUP |
||
REITORIA |
||
SPUP |
||
SASUP |
-
To check the type of operating system, write "settings" in the Windows 10 search box and click on the result of the search. In "Settings", select the "System" option. Next, select the "About" option and check the type of the operating system.
-
The numbers represent your student/mechanographic number and the institution represents your home institution (cdup, arq, fade, fba, fc, fcna, direito, fe, fep, ff, fmd, fpce, icbas, letras, med, reit, sas or sp).
More information:
Unit of Infrastructure and Network
E-mail: [email protected]