Content for students

Installing the automatic configurator
-
Download MacOS VPN L2TP/IPsec Automatic Configurator for your institution [ 1 ];

Automatic configurator download
-
Execute the automatic configurator and select the "Continue" option when asked if you want to install a VPN;
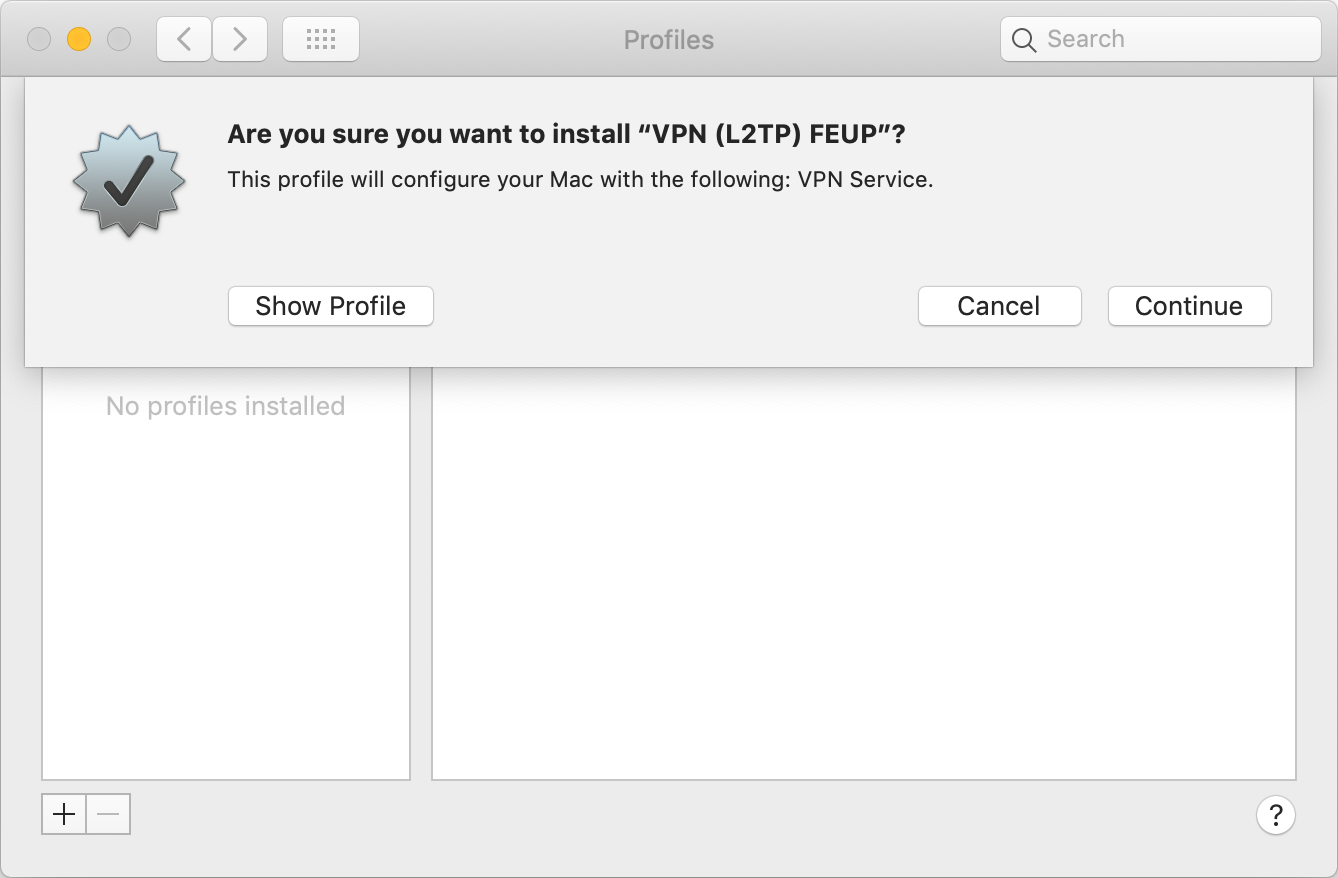
"Continue" Option
-
Select the "Continue" option when asked if you want to install a VPN profile;
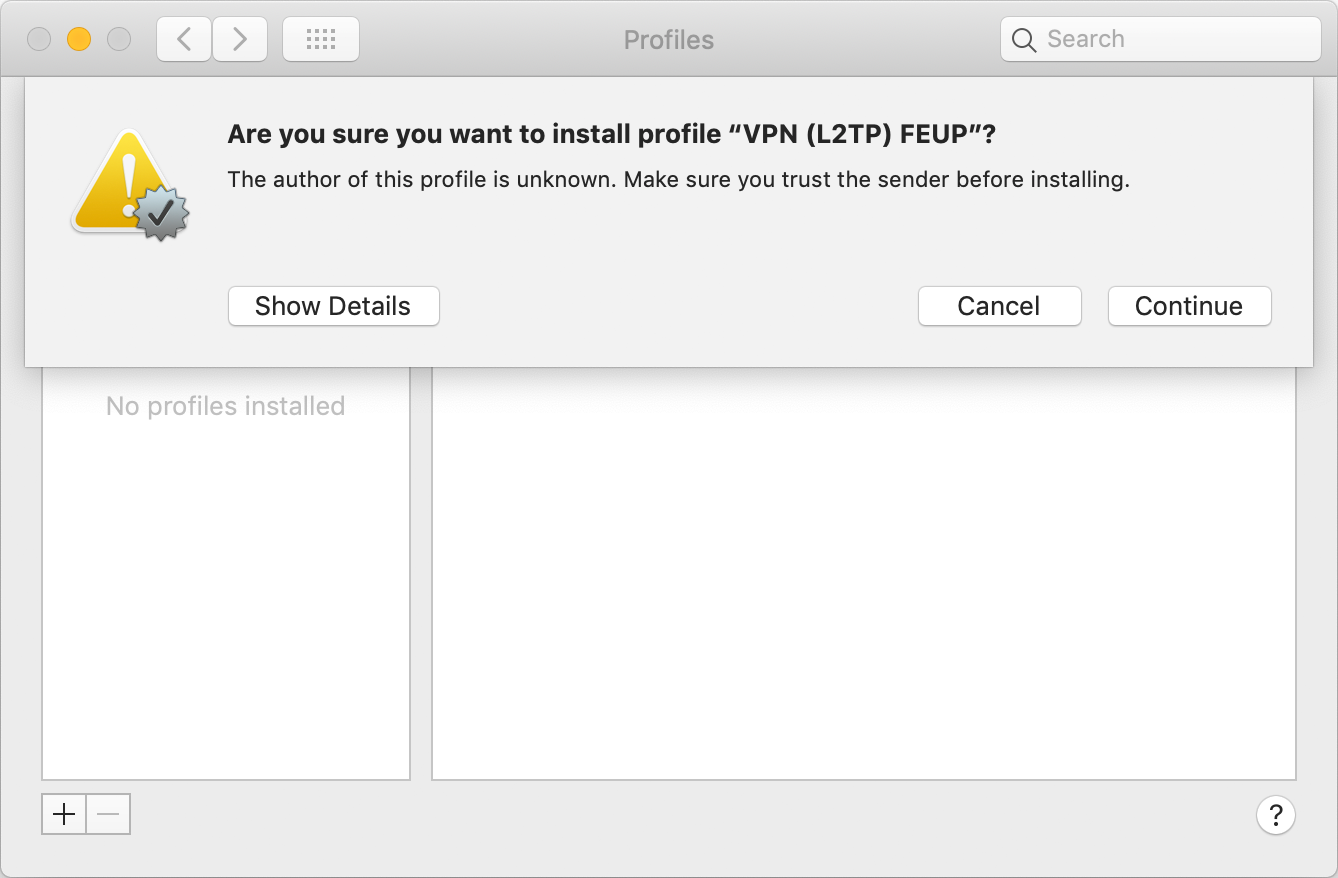
"Continue" option
-
Insert the username in the format up[123456789]@[institution].up.pt[ 2 ] and the password of the Information System.
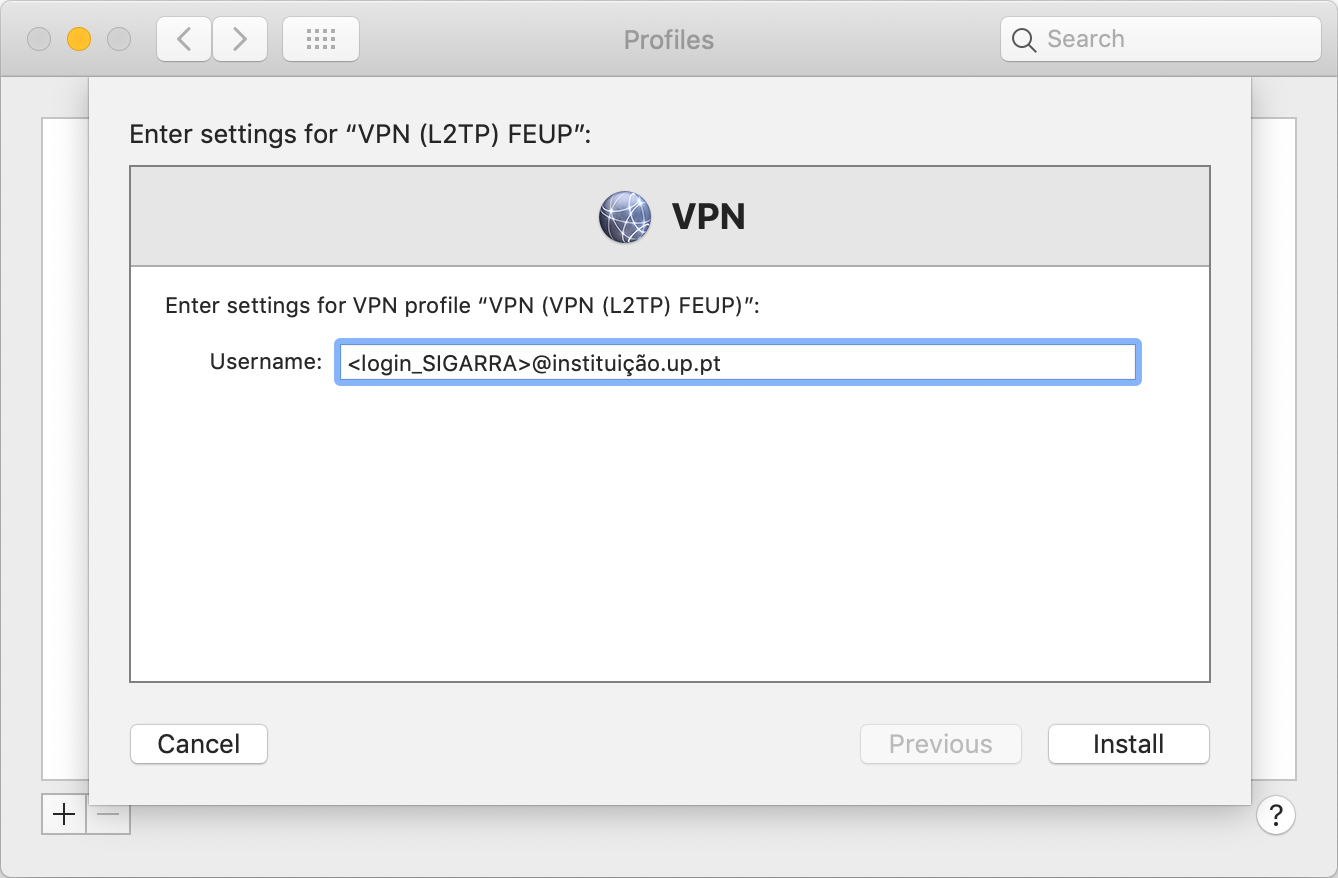
"Install" Option
-
When requested, insert the Mac administrator's "Username" and "Password" and select "OK".
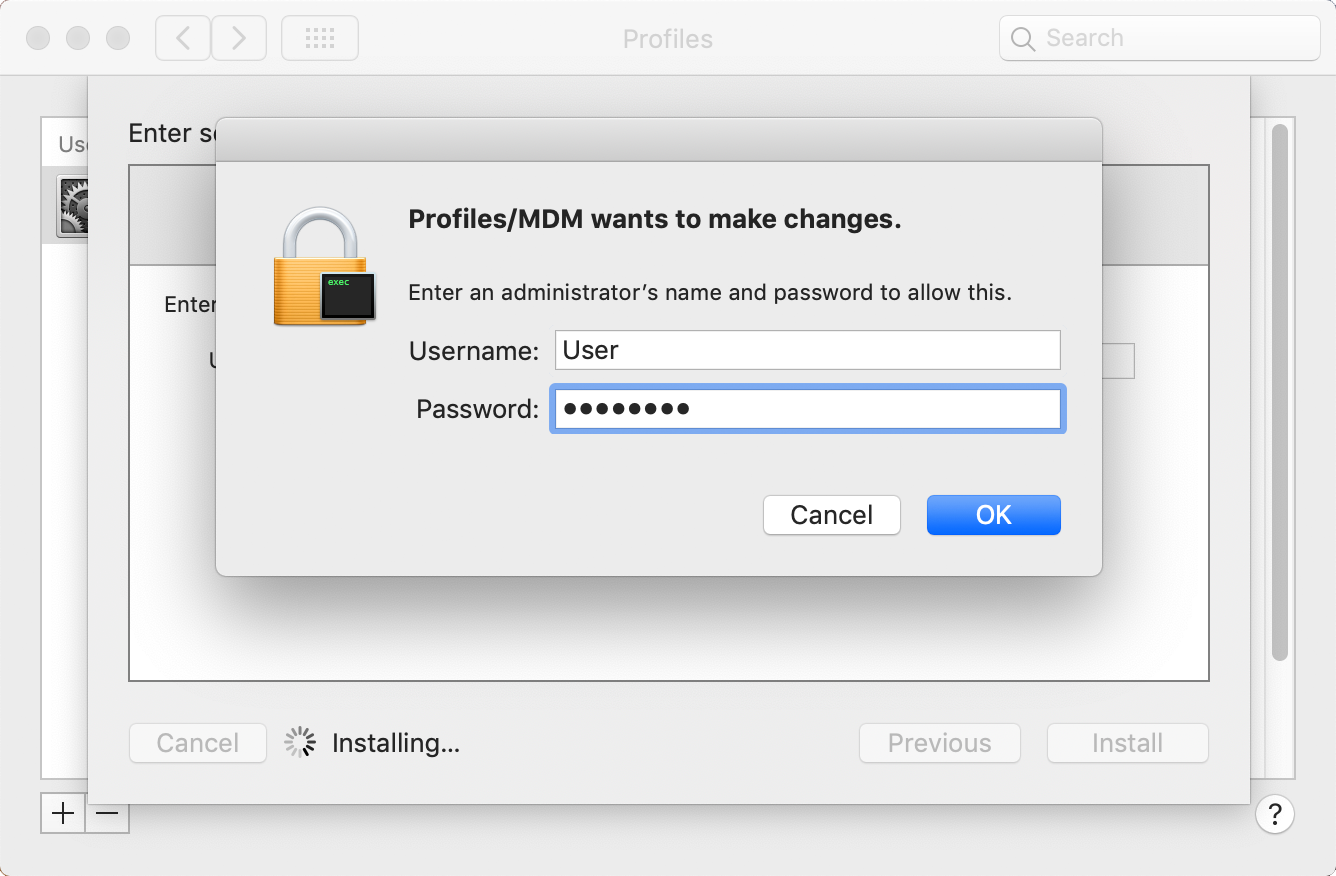
"OK" Option
-
The installation finishes when the "Profiles" window appears and shows the institution's VPN (L2TP) connection.
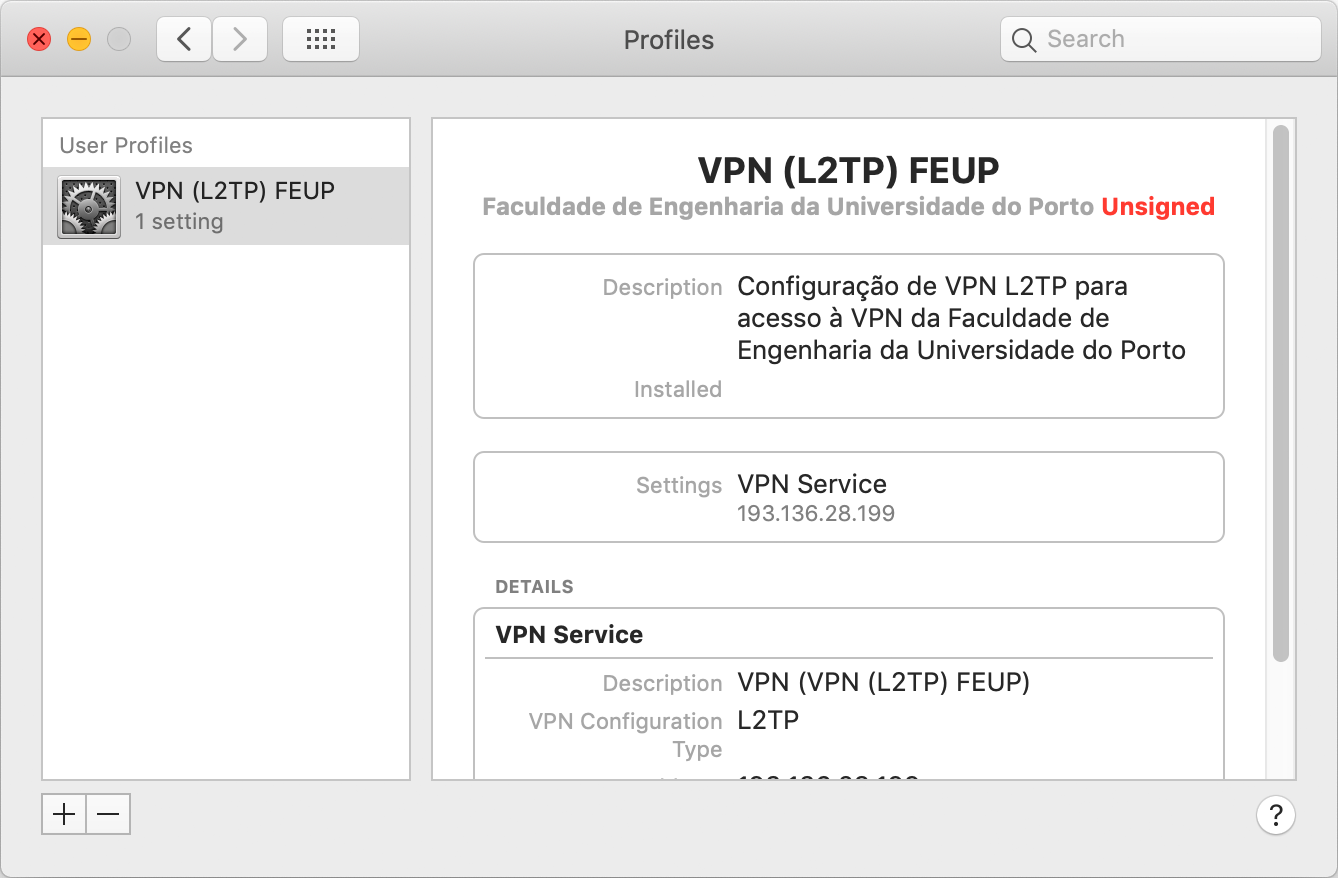
Installation complete
-
Close the "Profiles" window.
Connecting to the VPN
-
Go to the "Apple menu" and select "System Preferences".

System Preferences
-
Select the "Network" option.
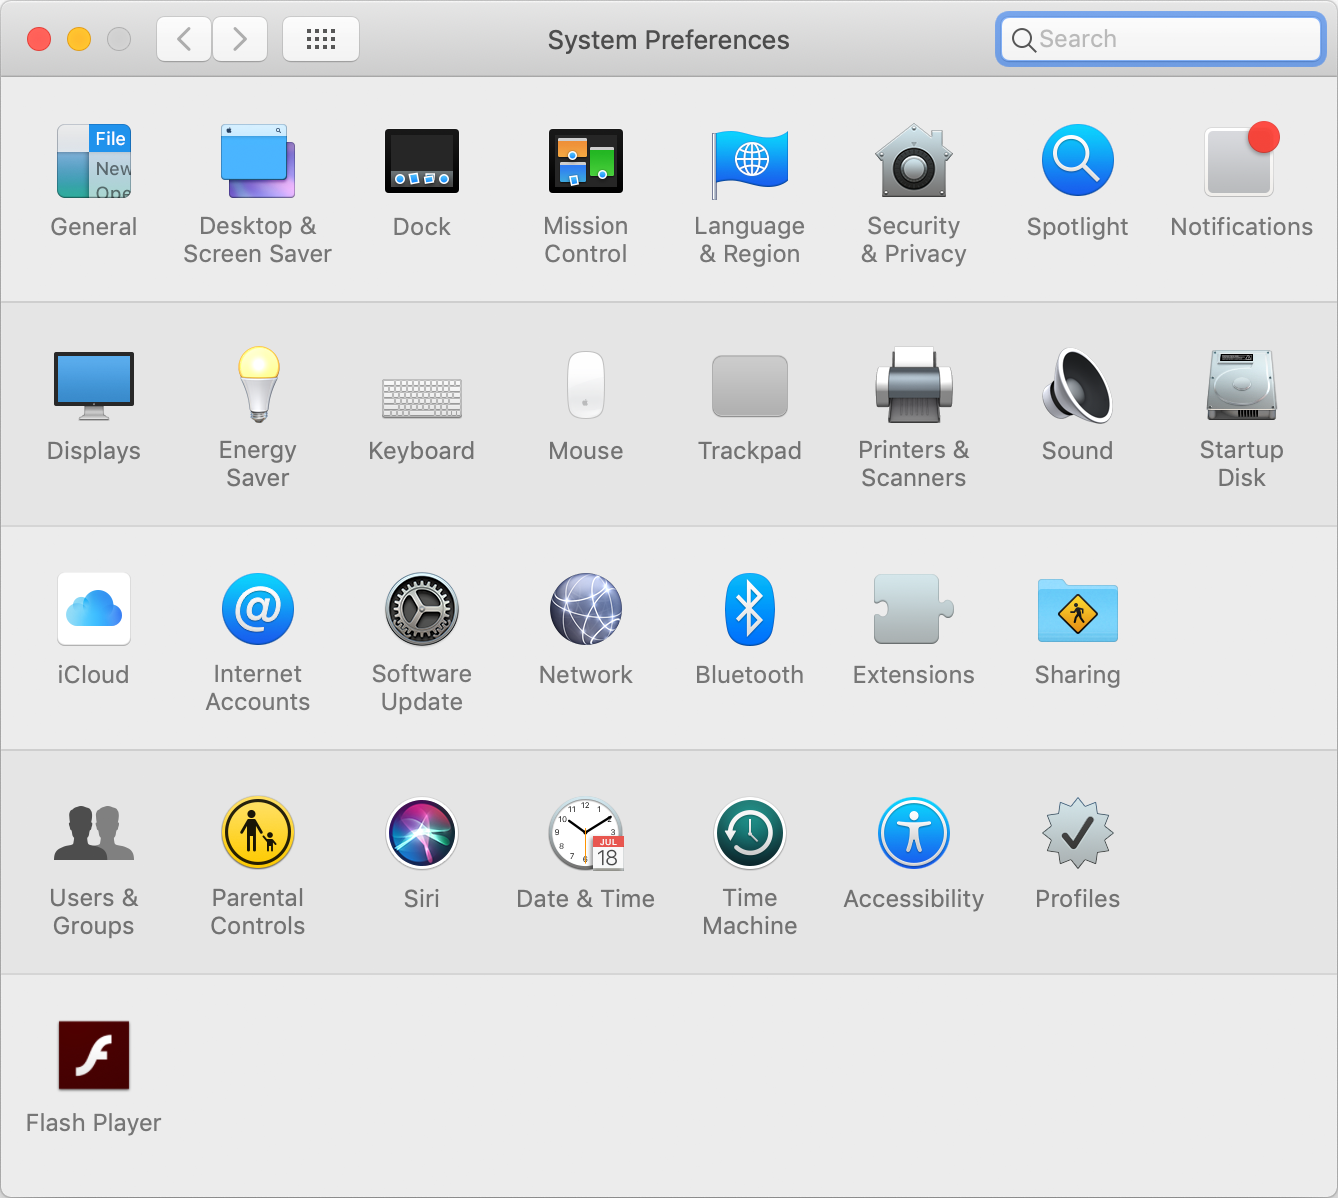
System Preferences
-
In the "Network" tab, select the VPN (L2TP) connection created.
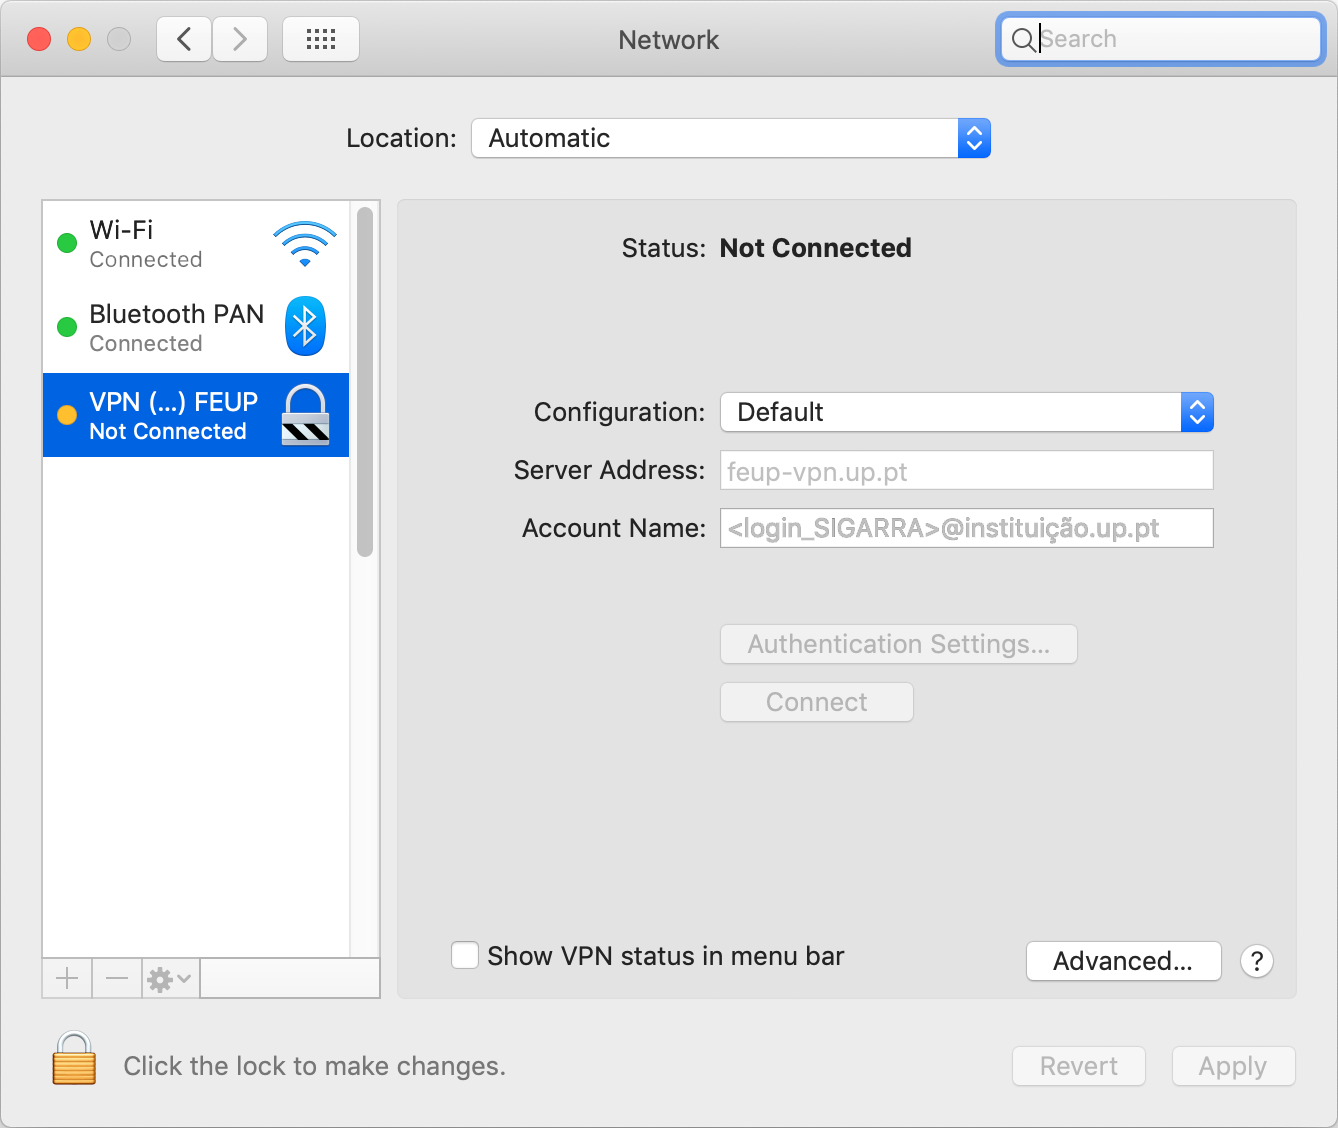
VPN (L2TP) Connection
-
Select the lock icon to make changes and, when requested, insert the Mac administrator's "Username" and "Password" and click on the "Unlock" button.
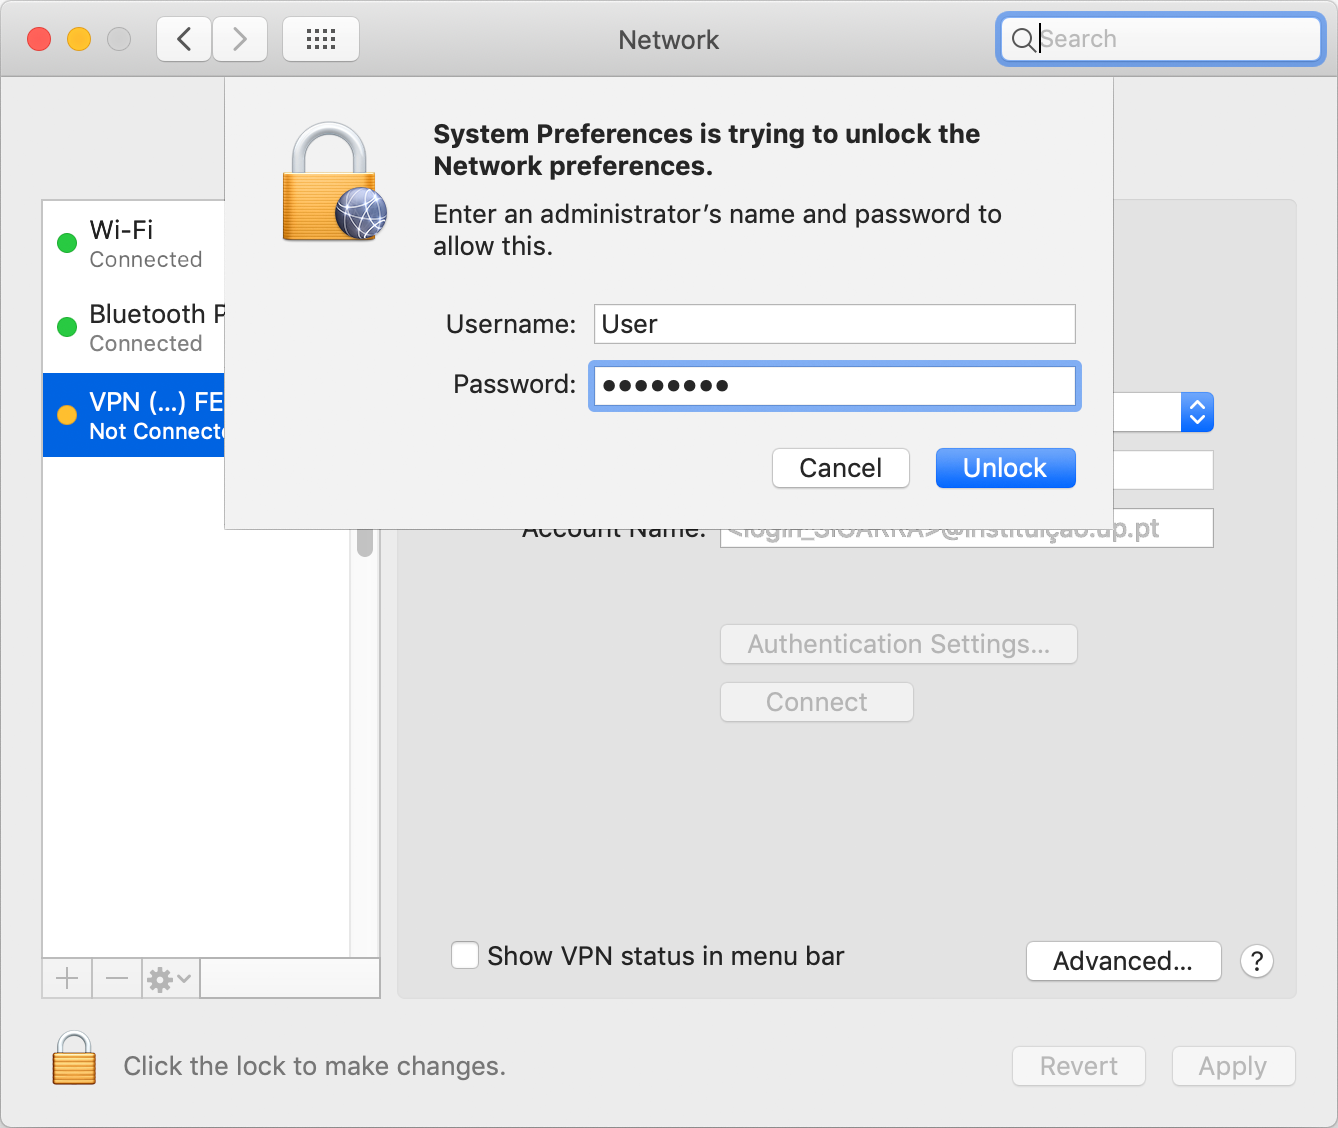
Unlock
-
After giving permission for changes to be made, select the "Authentication Settings..." option.
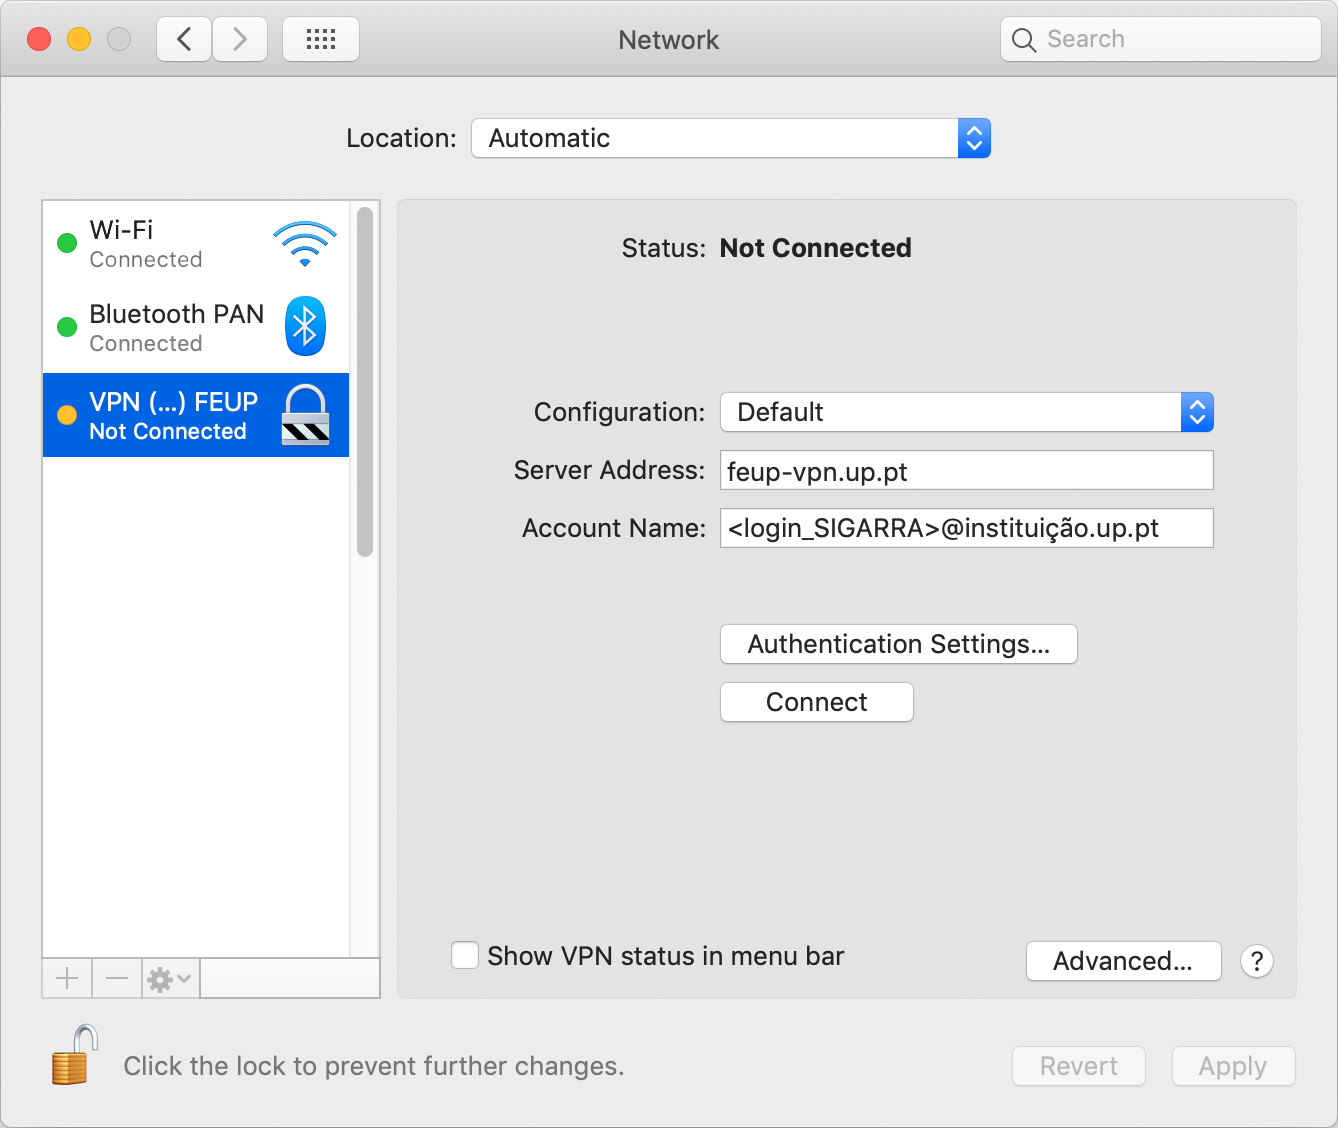
Authentication Settings
-
In the "Password" field, insert the password of the Information System and select "OK.
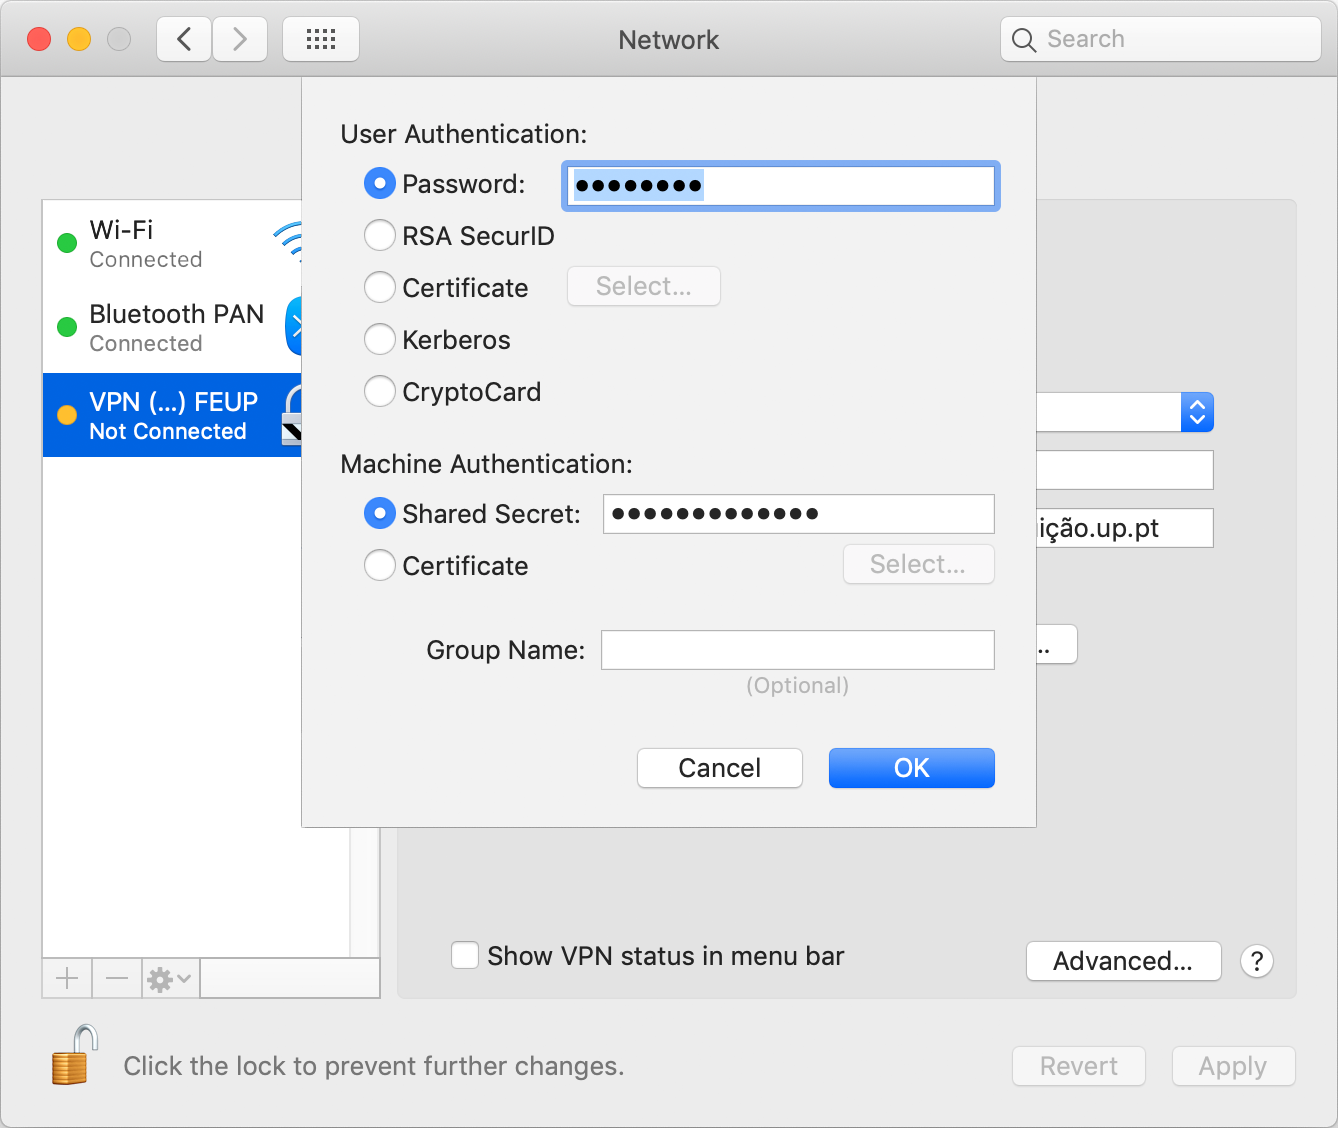
Authentication Settings
-
To facilitate access to the VPN connection from Mac's desktop, check the "Show VPN status in menu bar" option.
-
Select "Apply" for the changes to come into effect.
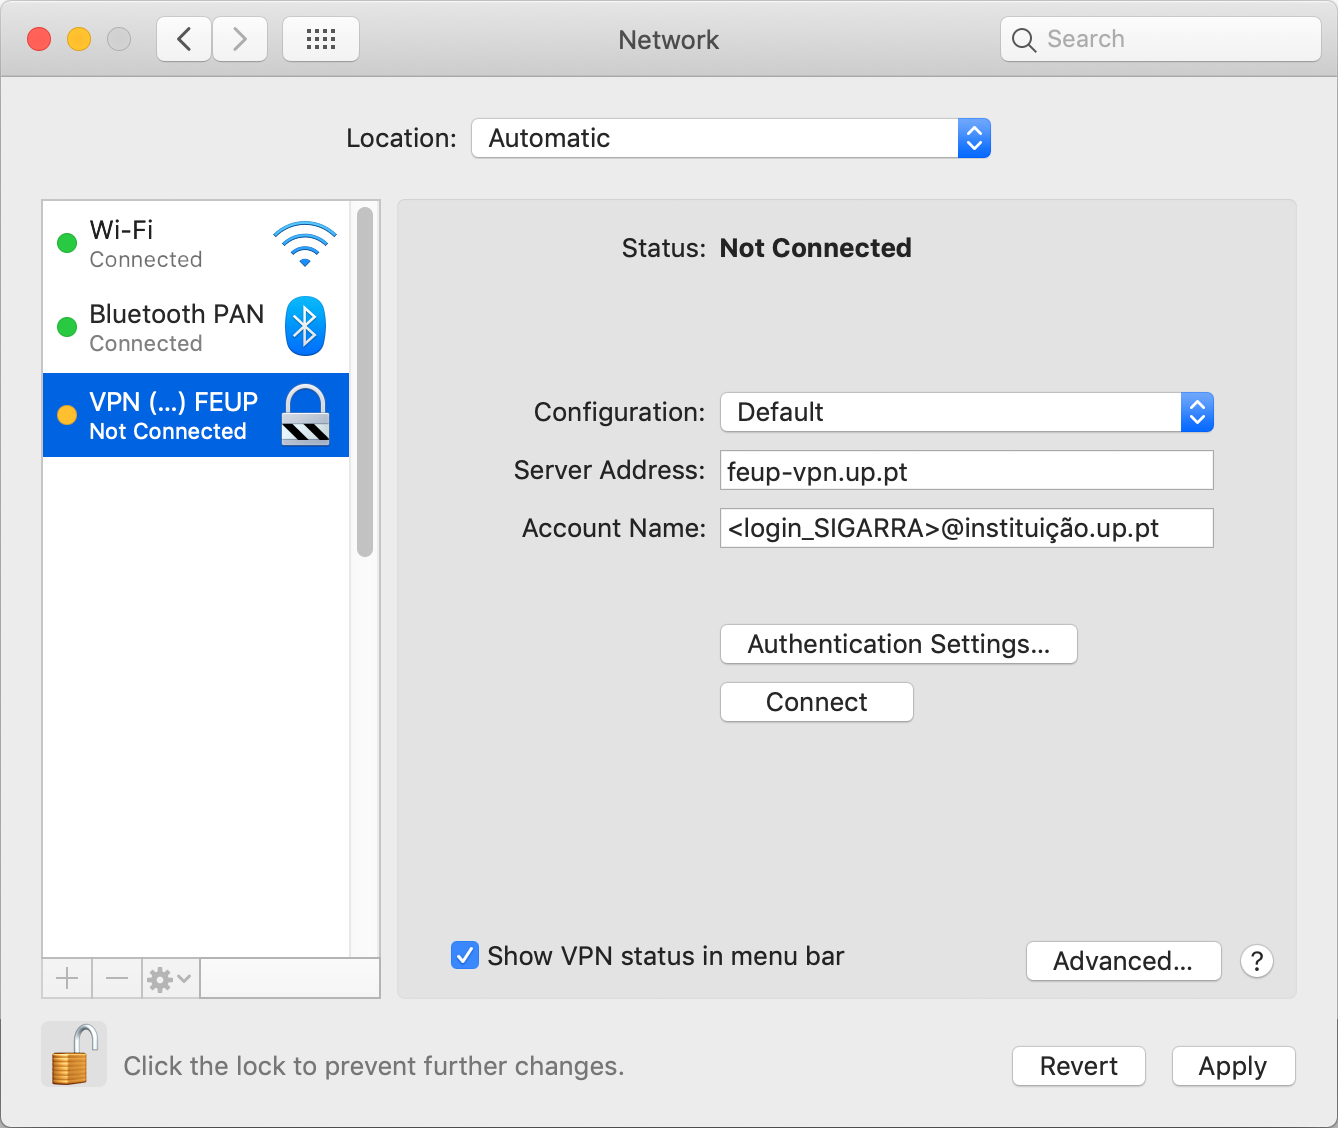
Show VPN status in menu bar
-
Select the "Connect" option to establish a connection;
-
If the connection is established, the status is described as "Connected".
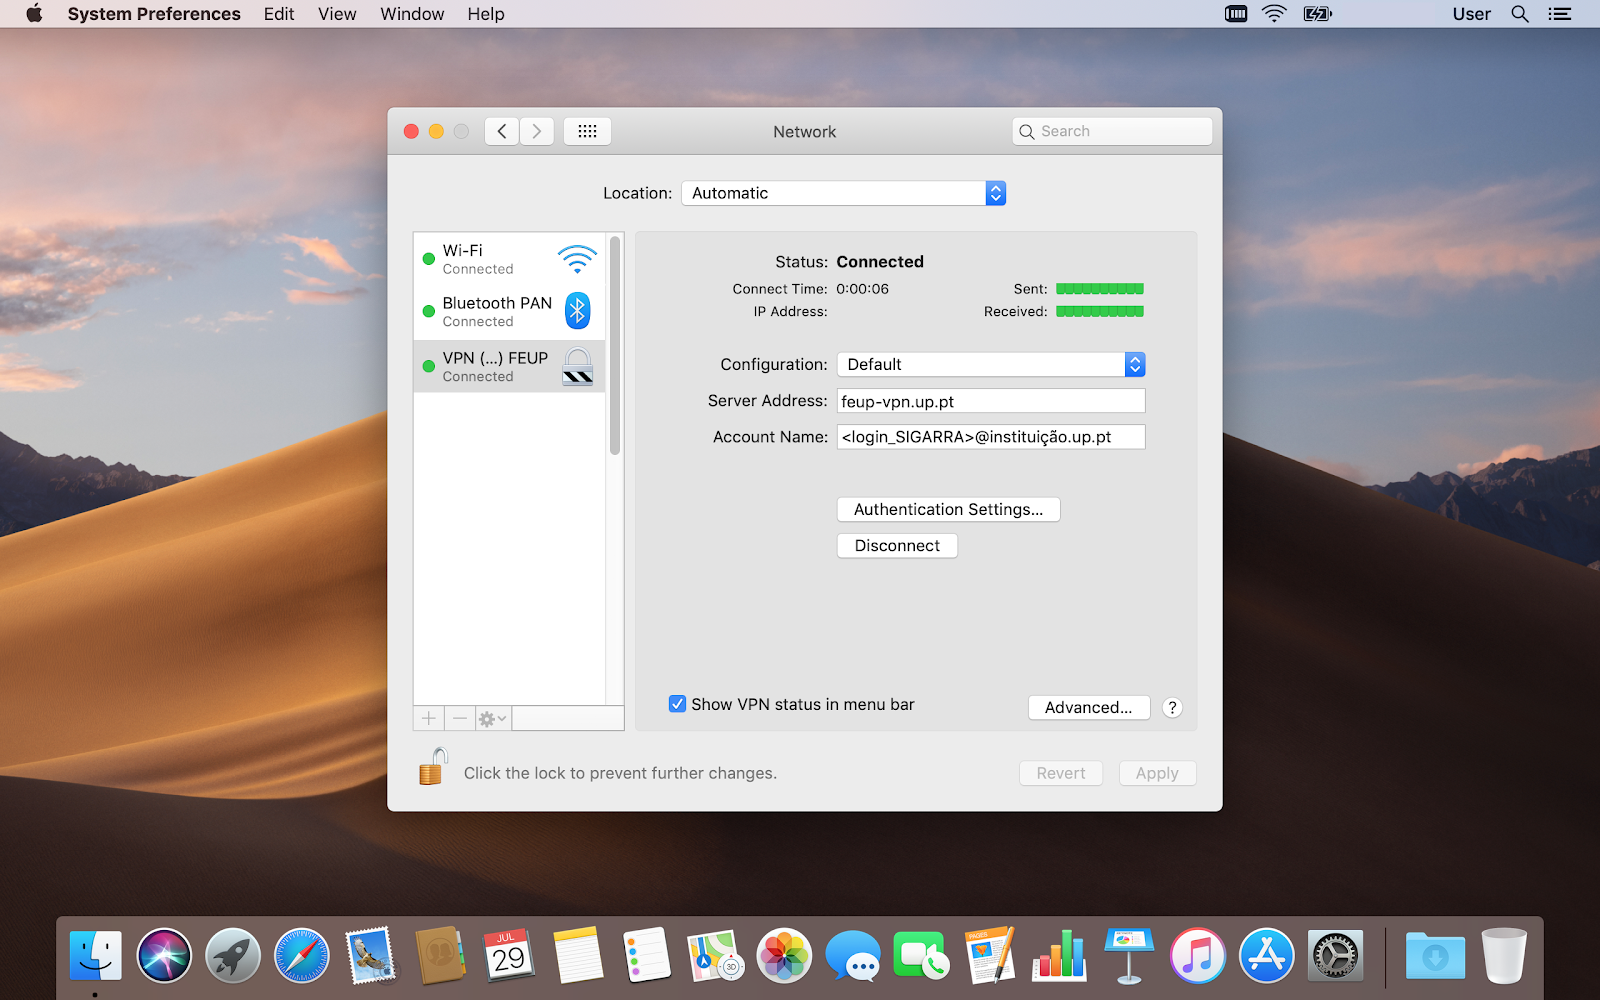
Establishing the connection
-
To use the VPN connection again, you can select the "VPN status" icon in the menu bar and select "Connect" in the desired VPN connection.

VPN Status
Notes
- MacOS VPN L2TP/IPsec automatic configurator by institution:
| Institution | Configurator |
|---|---|
FADEUP |
|
FAUP |
|
FCNAUP |
|
FDUP |
|
FEP |
|
FEUP |
|
FFUP |
|
FMDUP |
|
FMUP |
|
FPCEUP |
|
ICBAS |
-
The numbers represent your student/mechanographic number and the institution represents your home institution (cdup, arq, fade, fba, fc, fcna, direito, fe, fep, ff, fmd, fpce, icbas, letras, med, reit, sas or sp).
More information:
Unit of Infrastructure and Network
E-mail: [email protected]
